The kitchen is one of the most frequently used functional spaces in daily life. A beautiful, functional and personalized kitchen not only enhances the cooking experience, but also significantly increases the overall value of the home and the comfort of living.
Among the many kitchen renovation projects, cabinet remodeling is undoubtedly one of the most cost-effective options. Compared to complete demolition and reconstruction, cabinet remodeling retains the stability of the original structure, while providing a fresh look and feel through localized updates.
Whether it's repainting, replacing handles, refinishing with fancier finishes or functional upgrades, these actions can give an old kitchen a new lease on life. Whether you're looking for a minimalist modern look or favor a vintage country feel, you can achieve your ideal kitchen look at a fraction of the cost if you choose the right approach.
In this article, we will provide you with a systematic compendium of 10 kitchen cabinet remodeling methods, and combine professional advice with practical tips to help you find the most suitable remodeling solution for you.
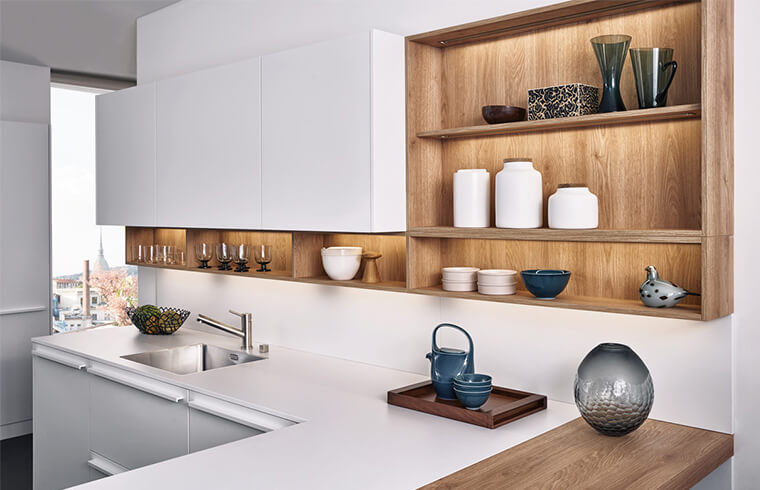
Determining the status quo: which type of remodeling is right for your cabinets?
The first thing to do before beginning any renovation work is to thoroughly assess the state of your existing cabinets. This step determines which remodeling strategies you can pursue and whether you need to call in professional assistance.
Different materials determine the subsequent treatment:
Solid wood cabinets: can be sanded, painted or stained and are suitable for a variety of refinishing methods.
Laminate cabinets: smooth surface is not easy to adhere to the paint, need to be sanded before applying special primer.
2pac coated cabinets: durable but difficult to DIY refurbishment, it is recommended to be handled by a professional spraying team.
Check the structural integrity of the cabinets:
Are there deformed door panels, loose hinges?
Are the cabinets solid? Does it need to be reinforced?
Are the drawer slides smooth? Is there aging?
Consider whether the current cabinet style is outdated and coordinated with the overall home style. For example:
If the home is modern minimalist style, dark high gloss cabinets may be more appropriate
If it is Scandinavian style, it is more suitable for white or original wood color.
Observe whether the storage space is reasonable:
Is there any dead space?
Do you need to add storage accessories (e.g. pull-out baskets, corner shelves)?
Can the efficiency be improved by adjusting the layout?
Tips: Create a “Cabinet Inspection Checklist” to record each cabinet’s issues and improvement needs. This will help you plan your project clearly.
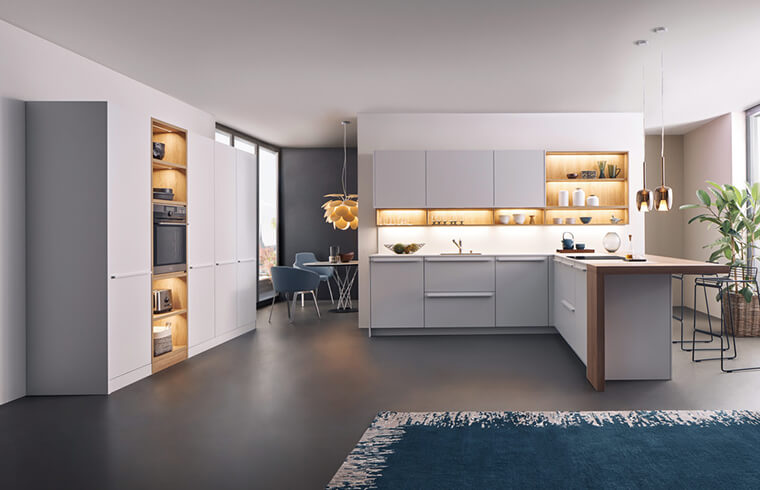
Below are 10 effective ways to give your kitchen cabinets a fresh new look, grouped by type and difficulty level. These ideas cover everything from basic refreshes to creative updates, so you can choose what fits your budget and skill level.
1. Painting (Painting)
One of the most common and affordable ways to update cabinets.
Best for: Solid wood, laminate, MDF cabinets
Steps:
Clean and remove all doors, drawers, and hardware.
Sand surfaces (from coarse to fine grit) to remove old finish and increase paint adhesion.
Apply a primer coat, especially on laminate or older wood.
Paint with matte, satin, or gloss finish in layers, letting each dry before applying the next.
ouch up edges and gaps, then reinstall new hardware.
Advanced Tip: Try crackle finishes or distressed effects for a vintage or artistic touch.
2. Laminate/Veneer Overlay
A great alternative if you want to change the look without painting.
Recommended materials: PVC film or thin wood veneers with wood-grain or stone patterns
Benefits: No sanding needed, fast installation, excellent coverage
Tips:
Use strong adhesive to ensure seams stay flat.
Cover edges with trim strips to prevent peeling.
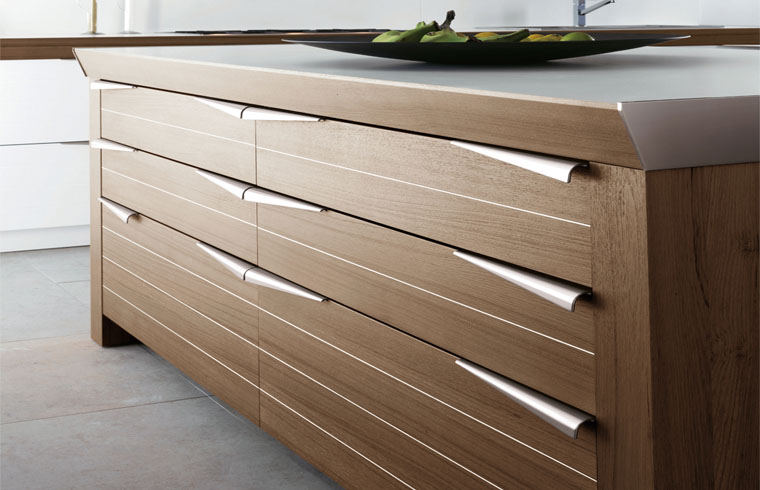
3.Replace Cabinet Doors
Keep the original frames and simply swap out the doors and handles.
Buying Tips:
Standard sizes can be found at home centers or online.
For custom sizes, opt for cut-to-measure services.
Installation Tips:
Measure carefully and allow space for proper fitting.
Keep hinge positions consistent or adjust according to the new doors.
Consider hidden hinges or handleless designs for a sleek look.
4. Add Trim or Molding
Add visual depth and character to flat panel doors.
Materials:
6mm plywood strips (great for DIY)
Pre-made molding (ideal for traditional styles)
Steps:
Cut molding to fit around the door frame.
Attach using wood glue and small nails.
Fill gaps, sand smooth, and paint for a unified finish.
5. Replace Hardware (Handles & Hinges)
Changing handles and hinges is a small change that makes a big difference.
Popular trends
Matte black: stylish and easy to match with modern themes.
Brass or copper: warm and classic, perfect for vintage or French country looks.
Wood handles: natural and cozy, ideal for rustic or Japanese-inspired kitchens.
Installation Tips:
Use blue putty to mark new hole positions before drilling.
If holes don’t align, fill them with wood filler and redrill.
6. Add Storage Accessories
Improving function is just as important as improving appearance. Recommended items:
Pull-out shelves: make it easier to reach items at the back of deep cabinets.
Lazy Susans: solve the problem of wasted corner space.
Lift-up baskets: help access items stored high up.
Side-mounted spice racks: save countertop space.
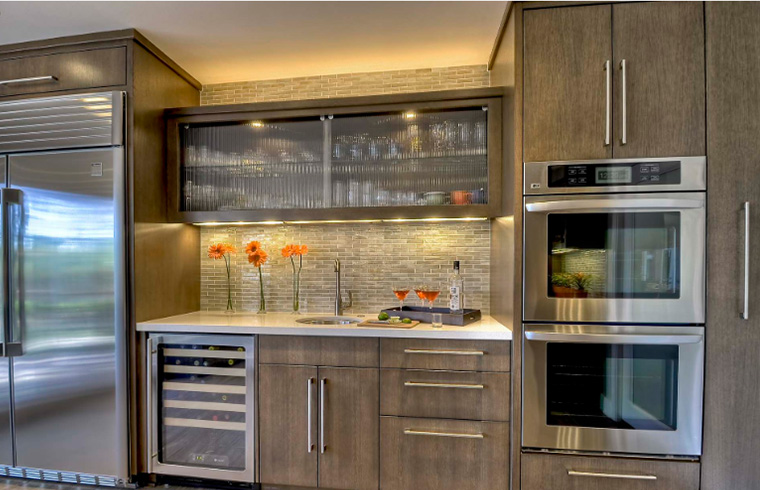
7.Build a Rolling Butcher Block Island (with Island Kitchen Cabinet Option)
If your cabinets are outdated, consider replacing part of them — such as adding an island kitchen cabinet — instead of redoing everything. A rolling butcher block island is a smart and stylish solution that can serve as both a functional workspace and a focal point in your kitchen.
Advantages:
Natural wood adds warmth and beauty.
Can serve as a prep area, breakfast bar, or temporary workspace.
Mobile base allows for flexibility.
An island kitchen cabinet built into the design offers extra storage without taking up wall space.
DIY Tips:
Materials: Use birch or layered solid wood cutting board for the top surface.
Frame: Choose a metal frame with wheels or build a wooden base to support the countertop.
Storage Addition: Add shelves or drawers underneath for the "island kitchen cabinet" function.
Tools: Basic woodworking tools like a drill, saw, and sander will get the job done.
This versatile piece not only enhances your kitchen’s layout but also brings added value and functionality — all while keeping your renovation project simple and budget-friendly.
8. Faux Finishes (Crackle or Distressed Effects)
Create unique textures like aged or antique finishes.
Techniques:
Crackle finish: apply crackle medium between coats for an aged look.
Distressing: layer paint, sand, and add stains for a lived-in feel.
Water transfer printing: apply marble, wood grain, or other decorative patterns.
9. Change Color Scheme
Update the color palette to match your personal taste or home decor.
Modern style: go for bold colors like navy blue or forest green.
Scandinavian style: stick with whites, light grays, and natural wood tones.
10. Add Lighting Features
Lighting can dramatically improve both function and atmosphere. Options:
Under-cabinet LED strips for better visibility.
Pendant lights over islands or dining areas.
Recessed lighting for a clean, modern look.
Summary: From simple paint jobs to creative design ideas, each of these 10 methods offers its own benefits and suitability. You can mix and match based on your budget, time, and skills to create your ideal kitchen.
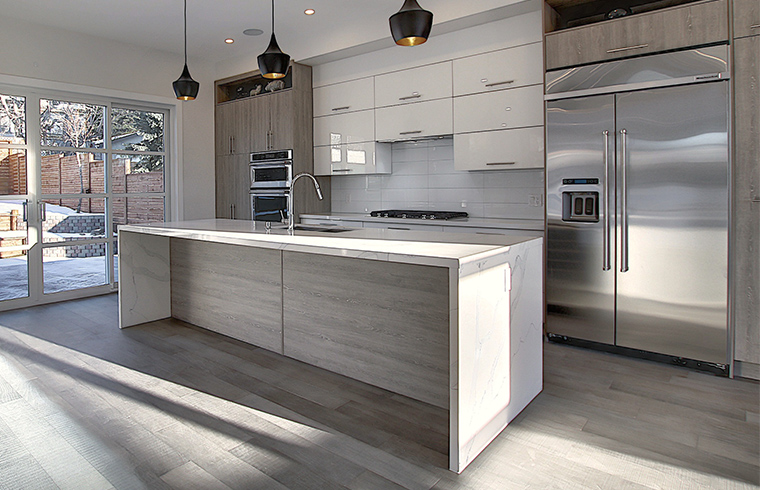
As the centerpiece of your kitchen, your cabinets’ style plays a key role in shaping the overall ambiance. When planning your upgrade, consider not only function and budget but also how the style fits with the rest of your home.
Key features: Clean lines, neutral colors, handle-free design
Color choices: White, gray, matte black
Material suggestions: High-gloss lacquer, matte PVC panels, stainless steel handles
Design tip: Use hidden hinges, built-in lighting, and integrated countertops for a neat look.
Key features: Vintage texture, natural materials, handcrafted details
Color choices: Natural wood tones, cream white, soft green
Material suggestions: Solid wood kitchen cabinet doors, antique brass handles, aged paint
Design tip: Add open shelves, tile backsplashes, and vintage pendant lights for a cozy feel.
Key features: Simple yet warm, with lots of natural light and wood
Color choices: White, light gray, natural wood — accented with deep blue or green
Material suggestions: Birch, pine, acrylic or glass doors
Design tip: Use small metallic or ceramic handles, sheer curtains, and indoor plants for freshness.
Key features: Bold, raw, and metallic
Color choices: Black, dark gray, rust red
Material suggestions: Metal frames, dark wood, concrete countertops
Design tip: Show off exposed hinges, use black hardware, and incorporate open metal shelves.
Tip: Always check how your cabinets coordinate with walls, floors, and lighting to avoid clashing styles. Consider creating a “style reference board” before starting your project.
Renovating your kitchen cabinets is a structured process. Proper planning helps control costs and ensures efficient execution.
Upgrade Method | Estimated Cost Range | Time Needed |
Painting | ¥500 - ¥2,000 | 1–3 days |
Laminate Overlay | ¥1,000 - ¥3,500 | 2–4 days |
Door Replacement | ¥2,000 - ¥8,000 (custom extra) | 3–5 days |
Add Accessories | ¥500 - ¥2,000 | Half day – 1 day |
Build a Rolling Island | ¥3,000 - ¥10,000 | 1–3 days |
Note: Prices vary depending on location, material brand, and labor costs.
Feature | DIY | Professional Help |
Cost | Lower (only materials) | Higher (includes labor) |
Time | Flexible | Requires scheduling |
Skill Level | Needs some hands-on ability | No technical knowledge needed |
Results | Varies based on experience | More consistent and durable |
Best for | Hands-on people with time | Busy homeowners who want quality |
Day 1: Remove old doors, clean and sand
Day 2: Prime or install overlays
Day 3: Paint and let dry
Day 4: Install new hardware and accessories
Day 5: Reassemble and clean up
Note: Allow enough drying time between paint coats — especially when applying multiple layers.
Kitchen cabinet upgrades often involve chemicals and tools, so safety and environmental impact should be considered.
Paints: Use low-VOC water-based paints to reduce harmful emissions.
Glues/Sealers: Opt for non-toxic formulas to avoid strong odors.
Hardware: Choose stainless steel or brass for durability and less maintenance.
Eye protection: Wear goggles to avoid dust or paint particles.
Face mask/respirator: Especially important during spraying.
Gloves: Protect skin from chemical exposure.
Ventilation: Work in a well-ventilated area.
Fire safety: Store flammable materials away from heat sources.
Old paint cans/glue bottles: Dispose of as hazardous waste.
Waste wood/sandpaper: Recycle or take to a construction waste site.
Metal parts: Recyclable materials.
Reminder: Try to keep the original structure intact. Less demolition means saving resources and reducing carbon footprint — making your project more sustainable.
A kitchen cabinet makeover is one of the most rewarding and cost-effective ways to refresh your home. Whether you opt for a simple paint job, install new cabinet doors, or add functional upgrades like pull-out shelves or lighting, even small changes can significantly enhance both the appearance and efficiency of your kitchen. With proper planning, an understanding of your cabinet’s current condition, and the right design direction, your kitchen transformation can be both practical and inspiring.
Ready to elevate your kitchen with quality, custom cabinetry?
BFP Cabinet, a trusted China kitchen cabinet manufacturer, offers professional-grade kitchen cabinet solutions with tailored designs, durable materials, and expert craftsmanship. Whether you're upgrading a few elements or planning a complete cabinet overhaul, BFP is here to help you bring your vision to life.
Explore our collections or contact us today to start your kitchen makeover journey!
Q: Do I need to renovate the inside of the cabinets too?
A: Only if there are mold, pests, or serious damage. Otherwise, cleaning and minor repairs are usually enough.
Q: How long after painting can I use the cabinets again?
A: Light use is possible after 24 hours, but full curing takes about 7 days.
Q: How can I prevent paint from chipping?
A: It starts with proper preparation — clean, sand, prime. Use high-quality paint with strong adhesion, and avoid aggressive cleaning too soon.
Q: Can I expand storage without replacing the entire cabinet?
A: Absolutely! Add pull-out shelves, lazy Susans, or lift-up baskets. You can also convert closed cabinets into open shelves.
Q: Can I refinish 2pac-coated cabinets myself?
A: Not recommended. 2pac is a two-part polyurethane coating that requires professional spray equipment. DIY attempts often result in poor adhesion and finish.
We employ cookies to analyze website traffic and enhance your browsing experience. Data securely aggregated, privacy protected. See Privacy Policy for details.